Accordingly, every message includes the sender's and recipient's addresses.
Why this is important
The sending email server sees the “sender” domain when initiating the session and your recipients will see your “from” address. Using the same sender's domain as the From domain improves delivery. Always remember, delivering emails successfully depends on one thing - sending emails to the right people consistent with your brand.
How to view, edit, and add verified senders
Adding a verified sender -known as the "From" address- to your marketing campaigns is an important step. This is how it's done:
- 1. Hover over the account name located in the upper right-hand corner of the page.

- 2. Choose Account from the dropdown menu.

- 3. In the Account menu select Senders.

- 4. Click on + Add sender.
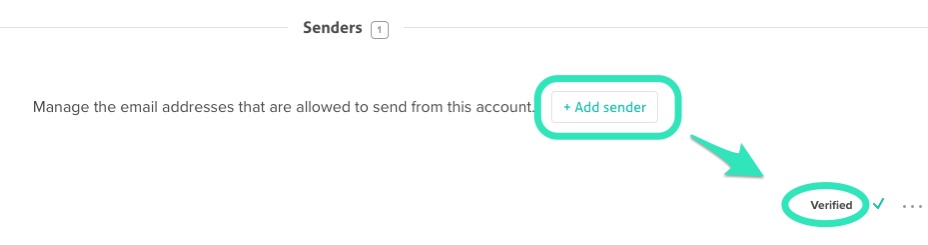
Upon verification, any email address added to the sender list can be used. Please take a moment to read the following article before changing your sender email address: Changing my Sender Email address.
Before sending your first campaign, we strongly recommend that you authenticate the sender email’s domain in order to improve email deliverability. Contact us for more information.